General Settings 9 6
In this settings panel you can configure many settings which are given below:
- Basic Settings
- Captcha Settings
- Layout & Color Settings
- File Upload Settings
- Ticket Settings
- Welcome & Footer Text
- Custom CSS & JavaScript
Basic Settings
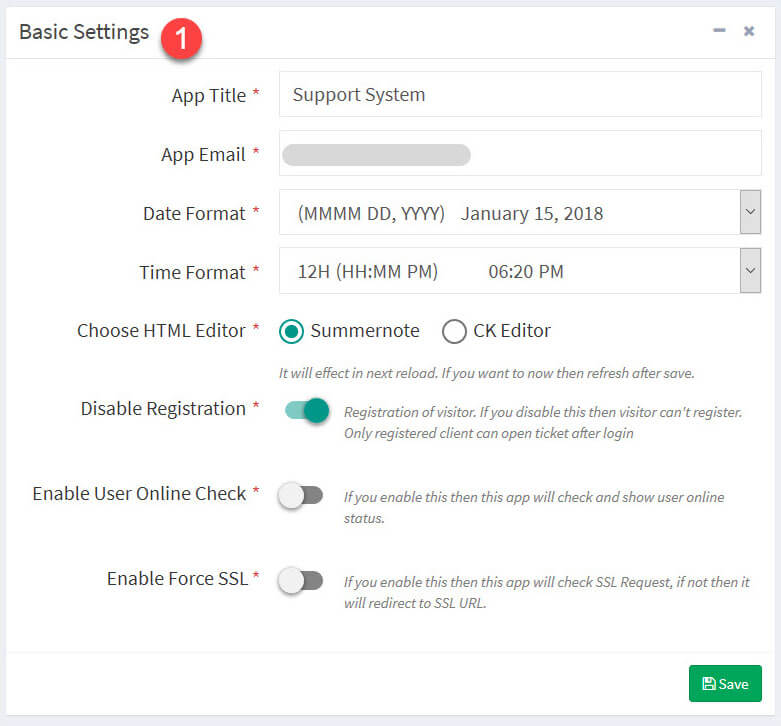
Here you could set many property which description are given below:
App Title: It’s the main application name. You have to set your application name here
App Email: It’s the main application email address. If application will send any notification email to this email address
Date Format: here you can choose your date format for this application. The best feature of this application is, user/viewer will see their timezone time and admin will see the time with admin timezone.
Choose HTML Editor: You can choose your HTML wysiwyg editor in here. There are two editor Summernote and CK Edittor. You can choose any one of this.
Enable User Online Check: if you enable it then user and admin user status will be seen. Green solid circle show online and gray circle for offline into the profile circle image. It shows the user online status.
Enable Force SSL: if you enable it then site always will be redirect with https if the request comes with http request.
Save button will show you a notification of update status
Captcha Settings
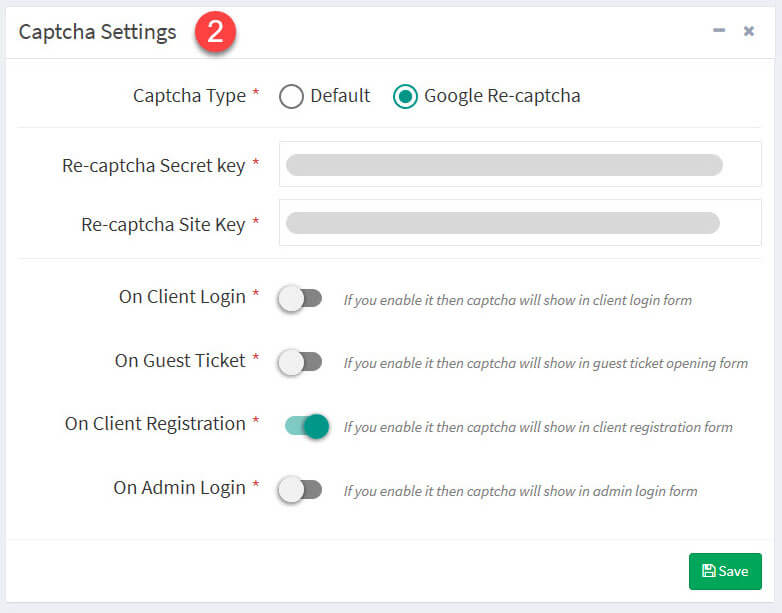
Here you can setup your captcha. There are two captcha in here Default and Google Re-Captcha.
Default captcha : it is image captcha , if you choose default captcha you will get some extra configuration like length of the captcha, type of captcha etc.
Google Re-Captcha : You can set google re captcha (Clicked based not image). You need to recaptcha API Secret and Site Key to use Google Re-Captcha.
You will get some switch button as well. Which shows where you want to show the captcha.
Layout & Color Settings

There are many layout base settings here All settings are describing bellow
Application Layout: Here you will get two layout first one is Full With second one is Box Size. If you choose full width then the content will show in full width. If you choose box width then it will set some margin in left and right side.
Main Color: it’s the main color of the application. You can choose any color for your application here. Other color ( Header Color, Welcome Background, Welcome text, Link and Heading, etc) will be generated with this main color if your doesn’t input manually.
Header Color: You can set header color manually here.
Header Gradient: If you enable then header will be little glossy.
Auto Other Color: If you enable it then other color will be generate automatically based on Main color. If you disable it then other color need to input manually.
You must press save button after any change of this box.
File Upload Settings
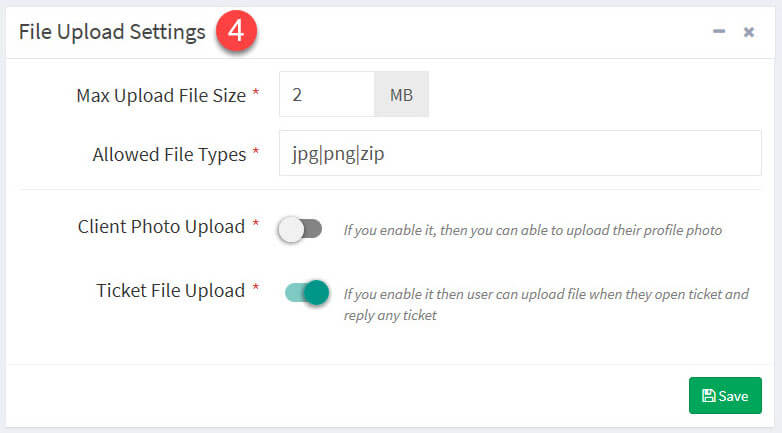
In this section you can set many file upload base settings. Like Max Upload file size, Allowed File Types. And there are two button as well. Client Photo Upload and Ticket File Upload.
Client Photo upload: If you enable this then ticket user can upload there profile pic in there profile
Ticket File Upload: If you enable it then user can upload file on ticket opening otherwise user can’t upload any file
Ticket Settings
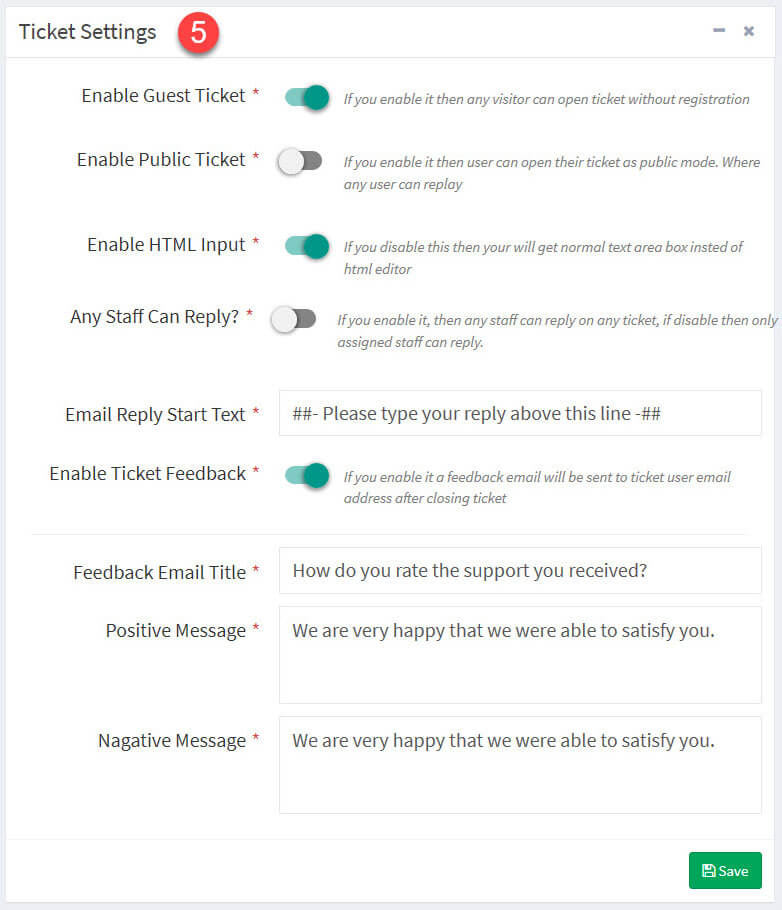
There are many ticket related settings here. All settings details are given below:
Enable Guest Ticket: If you enable it then guest user can open ticket but s/he needs to enter their email address but s/he can’t set ticket priority in guest mode. If disable then no user can open ticket as guest. s/he must need to register or social login to open a ticket.
Welcome & Footer Text
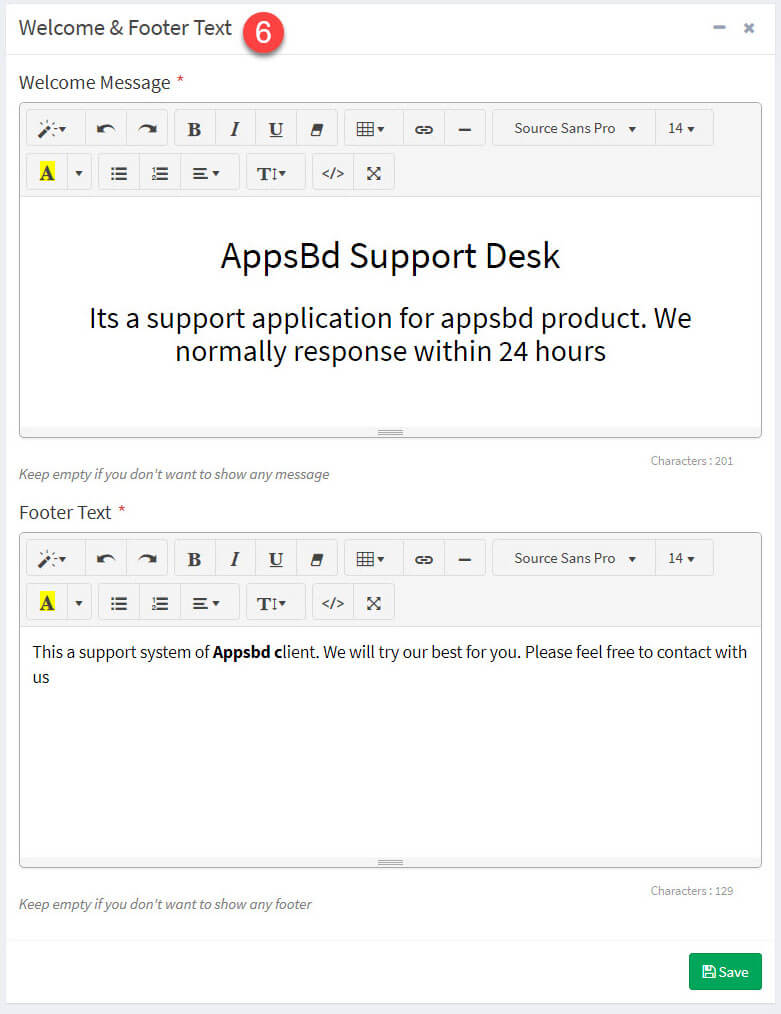
You can set your welcome text and Footer text here. It’s input box is a HTML Editor so you can add HTML as well.
Custom CSS & JavaScript
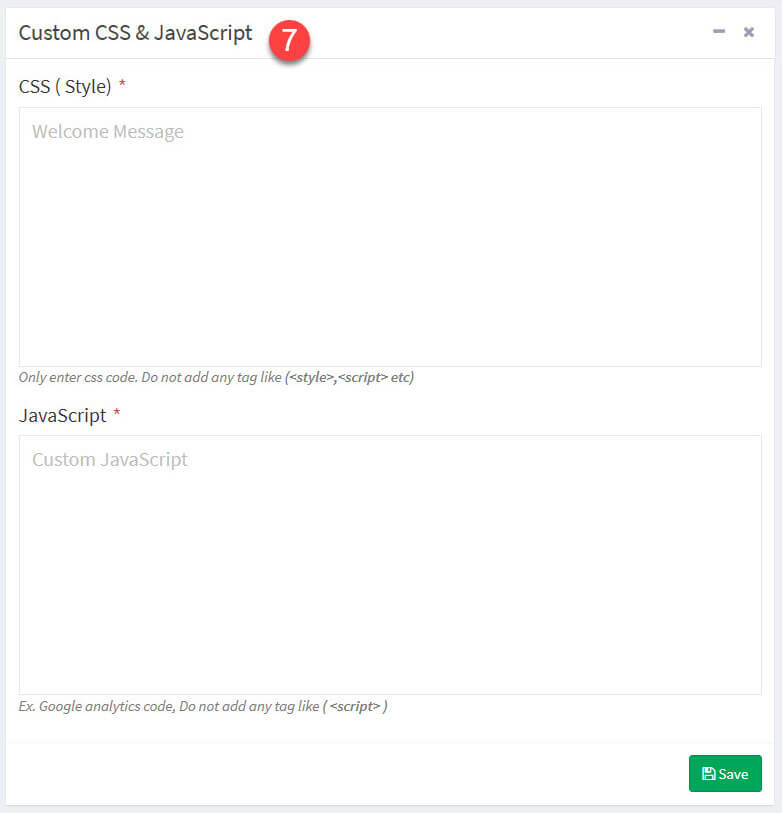
If you need any custom css or javascript, like google analytics code then you set here.